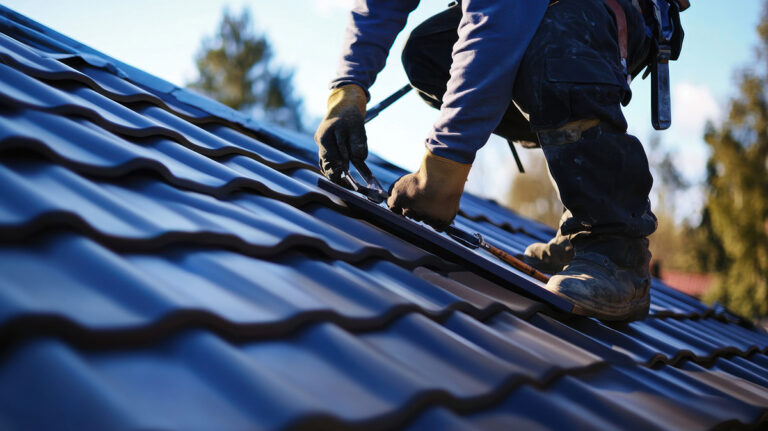

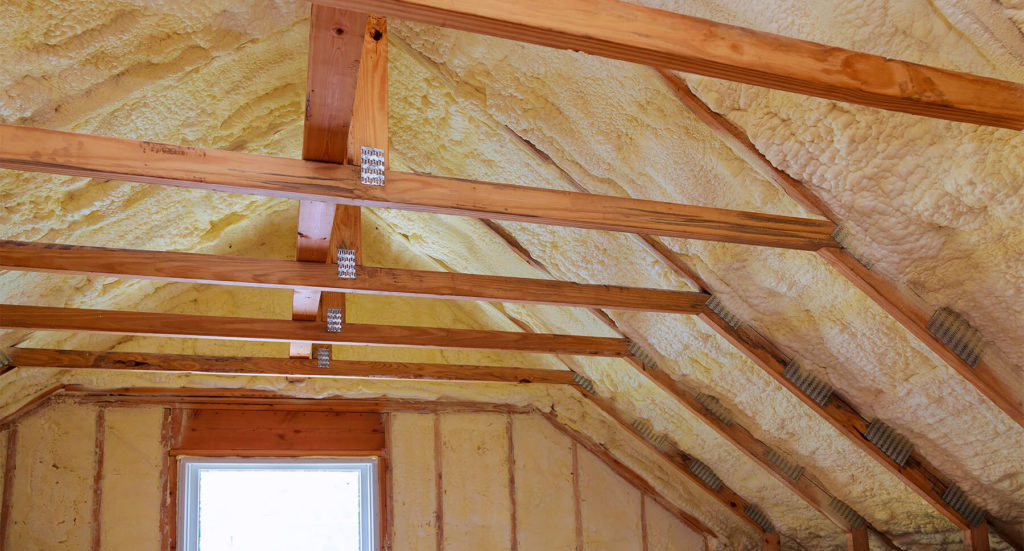
Spray foam insulation has found popularity in British lofts and roofs, providing solid thermal performance and reducing draughts. Yet, circumstances change. Property resale, roof repairs, mortgage constraints, or issues with poorly installed foam can all prompt the decision to remove this insidious material. While removal is certainly possible, it is a task with unique practical and health considerations.
Let’s unpack the process, focus on health and safety, explore methods of removal, and examine when it’s smart to get professionals on board, along with what the knock-on effects might be for your property.
Why Homeowners Consider Removal
Spray foam insulation, particularly the closed-cell variant, can sometimes create more problems than it solves. Among the most common reasons for taking it out are:
- Mortgage complications: Lenders might refuse loans or re-mortgages on properties with spray foam if the roof timbers can’t be inspected.
- Damp and condensation: Inadequate installation can trap moisture, leading to rotting timbers.
- Roof repairs: Needing to access or replace roof timbers turns foam into an impenetrable barrier.
- Resale issues: Some buyers, especially cash buyers, will walk away when spray foam is involved.
Understanding which type of foam you’re dealing with is key, as open-cell and closed-cell products have very different densities and removal challenges.
Types of Foam Insulation and Their Characteristics
A quick overview helps set the scene for what’s involved in removal. Foam falls into two basic categories:
Type | Cell Structure | Texture/Feel | Bond to Timbers | Primary Issues |
|---|---|---|---|---|
Open-Cell | Soft, flexible | Easily compressible | Weak-moderate | Less water-resistant |
Closed-Cell | Rigid, dense | Hard, stiff | Strong | More vapour-impermeable |
Understanding this not only affects the tools you’ll use, but also how gentle or forceful you can be to avoid damaging your roof.
Essential Health and Safety Preparations
Before touching a thing in your loft, take a moment to make safety your absolute first priority:
- Ventilation: The removal process kicks up dust, particles and residual fumes. Proper airflow is non-negotiable.
- Respiratory protection: Invest in a high-quality respirator with filters suitable for dust and chemical particulates.
- Skin and eye safety: Full sleeves, gloves, goggles. Spray foam debris is stubborn and can be irritating.
- Safe access: Lofts are precarious places; stable footing, crawl boards and never balancing on joists alone.
- Electrical precautions: Foam often encases wiring. Locate and isolate mains power as necessary.
These aren’t optional extras; foam components, especially isocyanates from older installs, aren’t something to risk inhaling or touching.
Methodical Approach to Removal
Start with a plan. Breaking the insulation out in stages reduces risk and inefficiency.
Step 1: Inspection and Preparation
Examine how thick the foam is, what areas it covers, and, crucially, what’s hidden beneath. If you haven’t already, decide whether you’re dealing with open- or closed-cell foam.
Remove stored items from the area. Lay dust sheets or plastic covers to collect debris for easier clean-up. Make sure you have bins or bags tough enough for sharp, sticky pieces.
Step 2: Mechanical Removal
Open-cell foam, being softer, is usually tackled with hand tools. A utility knife or handsaw slices through the top layer. A stiff paint scraper or blunt chisel helps prise it off wood or tiles. Don’t rely on brute force—move gradually and try to lever rather than bash.
Closed-cell foam is more challenging. Its rigidity and stronger adhesion call for:
- Plasterboard or wall removal tools (flat bars, crowbars)
- Scrapers with hardened edges
- Even oscillating multi-tools for stubborn spots
Take care: avoid damaging roof beams or membranes. Tiled roofs are especially vulnerable, as gouges and nicks can reduce their lifespan.
Step 3: Managing Remaining Residue
Some foam inevitably stays bonded to timbers or tiles as a thin layer. Removing these traces is vital if you’re preparing for future roof work or new insulation.
Possible methods:
- Sanding: Coarse sandpaper or oscillating sanding tools work, though this is messy.
- Wire brushes: Useful for awkward spots, but can roughen timber surfaces.
- Solvents: Not generally recommended unless specified safe for your building materials, as they pose risks to timber and occupant health.
For historic properties, or if your insulation was installed decades ago, get the foam tested for chemicals before using power sanders or solvents.
Step 4: Dispose of Debris Safely
Bag all removed foam in heavy-duty sacks. Treat spray foam as non-hazardous construction waste, unless testing reveals asbestos contamination (unlikely but possible in older homes). Contact your local authority for correct tips or recycling.
Avoid burning any foam insulation, as the fumes can be extremely toxic.
When to Bring in Professional Help
There are scenarios when removing insulation yourself ceases to be a viable—or even safe—long-term plan. If you spot any of the following, consult specialist contractors:
- Extensive roof coverage — If every rafter, joist and underlay is thickly coated
- Structural uncertainty — Signs of timber rot, sagging, warping
- Electrical entanglement — Wires embedded in or behind the foam
- Health conditions — Respiratory sensitivities or immune issues
- Insurance or warranty requirements — Guarantees may specify that only licensed professionals can work on roofs
Professional outfits have commercial-grade tools and PPE. They’ll also have the certificates or insurance lenders might require should you plan to re-sell or re-mortgage.
How Long Does Removal Take?
Timelines vary dramatically by property size, foam depth, and whether you’re tackling the task solo or as a team.
Loft Size | Open-Cell Removal (DIY) | Closed-Cell Removal (DIY) | Professional Removal |
|---|---|---|---|
Small (<15m²) | 1-2 days | 2-4 days | Usually 1 day |
Medium (15–30m²) | 3-4 days | 1 week+ | 1–2 days |
Large (30m²+) | Up to a week | 2 weeks | 2–4 days |
DIY efforts are extended due to manual methods, dust management and resting. Pros can usually strip, bag, and tidy up at speed, though at extra cost.
What Happens Next? Treating Timbers and Ensuring Future Protection
Removed foam can leave residue and surface damage. Before considering new insulation, inspect your timbers. Look for:
- Signs of rot, mould or insect infestation
- Wet patches or residual dampness
- Splits and cracks
Arrange for treatment or repairs before new insulation goes in. In some cases, a professional timber specialist will be needed to make good any issues uncovered by the removal process.
Then, take the opportunity to choose a more traditional, reversible insulation solution such as mineral wool, reflective foil or board insulation. Ensure roof structures are properly ventilated to combat future moisture build-up.
Alternative Insulating Options
If you’re removing foam due to lending or resale hurdles, it’s a good moment to look at alternatives appreciated by mortgage lenders:
- Mineral wool: Popular for its affordability and fire resistance
- Sheep’s wool: Natural, renewable and moisture-absorbent
- Rigid boards: Excellent for flat roofs or awkward gaps
- Multi-foil: Lightweight and quick to fit
Each of these options ticks the box for reversibility, breathability and ready inspection access for surveyors.
Lending and Surveyor Considerations
With increasingly strict standards, British lenders are often cautious about spray foam. If you’re preparing your property for sale or remortgage, keep documentation about your removal project, including:
- Photographs before, during and after removal
- Invoices for professional work, or receipts for hired equipment
- Any reports on timber health or post-removal treatments
Sharing a clear record with a buyer or surveyor reassures them that hidden traps don’t lurk above their heads.
Frequently Asked Questions
Is spray foam ever safe to leave in place? If properly applied, open-cell types in some low-risk locations can stay. However, mortgage and resale restrictions encourage removal in most homes where future flexibility is desired.
Can I just add new insulation over the top of old foam? Never a good idea. It can make condensation and timber issues worse while trapping unknown hazards. Complete removal and inspection is always preferable.
Does insurance cover foam removal? Most standard policies won’t. However, structural or pest damage found during professional removal might be included in some cases—check wording or consult your broker for advice.
Key Takeaways
- Removing foam insulation from lofts and roofs is challenging, but entirely achievable for capable DIYers or professional teams.
- Health and structural safety are critical. Cutting corners on PPE or technique can put both occupants and property at risk.
- Professional help is sensible for large, complicated, or hazardous jobs.
- Replacement with lender-approved insulation options builds value and peace of mind for years to come.
This process, whilst often physical and disruptive, gives you the chance for a healthier, more adaptable home long-term. Removing one hidden problem today paves the way for solved issues tomorrow.